en-US

User Management


User roles for this feature

Admin Co-admin Asset Manager Viewer
Users View
Add/Edit/Delete (Admin Role Blocked)


Overview

  • User management enables Admins and Co-admins to manage user access to each project
  • User roles define read/write privileges for dashboard features and resources
  • Users are added by project
  • Send invitations to new users requiring login credentials and MFA setup
  • Create role bindings for users with existing login credentials to another project or have been added through an enterprise SAML integration

User roles and privledges (all features)

Admin Co-admin Asset Manager Viewer
Dashboard View
Alerts View
Add/Edit/Delete
Agents View (Agent Name Blocked)
Add/Edit/Delete
Targets View
Add/Edit/Delete
Probing Distributions View
Add/Edit/Delete
Users View
Add/Edit/Delete (Admin Role Blocked)


Users

1. Tabs View Active Users and User Invitations

2. Search and filter

Search - Click the icon to expand text search to quickly find users by a variety of user attributes

  • Text search supports alphabetical search
  • Queries are limited to one text search
  • Combine a text search with one or more filters to create and statement queries
    • Example: Combining search and filters to return Admin users with name beginning with the letter “n”
Searchable Users Attributes
Attributes Usage note
Name Search by all or part of the contact’s full name. Search by email if the contact’s name returns no agent
Email - Search by all or partial email address
- Searching by the email’s domain is helpful to find agents owned by multiple people in an organization


Filters

User Filters
Filter Key Operator Filter options Example Usage tip
Role contains - Admin
- Co-admin
- Admin Viewer
- Asset Manager
(multi-select)
Combine with text search to return an alphabetical list of users with the same role


3. Users

Table columns
Column Displayed Value
Full name User’s display name link. Click through to the User page to view user information and Update the user’s role
Email User’s login email address
Role User’s role and privledges for the project
Verified indicates that the user has verified access credentials for the project
Actions ellipsis icon to open the actions menu
Edit opens the editing modal
Delete opens the confirm deletion modal


4. Create Role Binding button

  • Click to open the Create Role Binding modal
  • Enter the user’s email, assign a project role, and save to create the role binding
  • See Role bindings for project access to learn more about adding users with role bindings

5. Pagination

  • Tables support up to 100 rows per page.
  • Pagination controls show the count of items in the table.
  • Filtering and sorting change the count.
  • Use the dropdown to change the number of items shown in the table. Twenty-five items are shown by default.
  • Clicking the right arrow requests the next page of items, and the left arrow reloads items from the previous page.
  • Paginated results load sequentially, and arrows are disabled until the items in each request are loaded.

6. Table Sorting

  • No columns are sortable at this time.

7. Table export and customization

  • Export table
    • Click the icon to export agent record in .CSV or .JSON format
    • Each export outputs the agents and columns visible on the agent table page —-a maximum of 100 agents per export
    • Use pagination arrows to load additional table pages for export
    • Raw API values are exported and may differ from the plain-language labels and values seen in the dashboard
  • Customize table columns:
    • Click the icon to open the table customization modal
    • Table customization is stored in the web browser’s local memory and does not change the view for other users
    • Clearing the browser cache or using a different browser resets the default table columns and column widths
    • See the table customization section of the Agents article for a step-by-step guide to using table customization

Invitations

1. Filters

User Filters
Filter Key Operator Filter options Example Usage tip
Invited by equals Text
(exact match)
Enter the inviters email to find invitations created by admins and co-admins
State contains - Pending
- Declined
- Expired
- Invitations list is presorted by these states
- Accepted invitations are not visible


2. Invited users

Table columns
Columns Displayed Values
Invitee Email Invited user’s display name link. Click through to the Invitations page to view invitation details or delete the invitation
Invited By Email address of the admin or co-admin that created the user invitation
Expiration Date - Invitations expire in seven days
- Number of Days before or after expriation
- Declined indicates the user declined the project invitation
Actions ellipsis icon to open the actions menu
Edit opens the editing modal
Delete opens the confirm deletion modal


Adding users


Role bindings for project access

  • Role bindings enable admins to add users with existing credentials to additional projects without using a project invitation
  • Role bindings can also be used to add users in an enterprise SAML integration to projects

  • Click the Create Role Binding button on the the Users page
  • Enter the email address of an existing user
  • Assign a role to the user and save
  • The user automatically joins the project with the assigned role at the next login
  • Logged-in users will not see the new project until they logout and login again


Create Invitation

  • User invitations are used for new users that require login credentials
  • User invitations are emailed to users who follow the process outlined in the dashboard access for new users article

  • Enter the user’s email address
  • Assign a role to the users
  • Choose the language for the invitation email
    • Invitation language defaults to English
    • Language selection is saved locally as the new default language until it is changed or local browser storage is deleted
  • The inviting admin’s name and email address are added to the invitation by default
    • Check “Hide inviter name and email” to remove the admin’s information from the invitation email
    • This selection will be saved locally as the new default until it is unchecked or local browser storage is deleted
  • Saved invitations are listed on the Invitations tab of the Users page


User record

  • Click the user’s email address on the User tab to view information about the user
    • Click the icon to edit the user’s role
      • The user’s email, name, and ID cannot be edited
      • User roles can also be changed by clicking the ellipsis icons in the users tab

    • Click the icon to remove a user from the project
      • Logged-out users lose project access immediately
      • Logged-in users continue to have access until the next logout


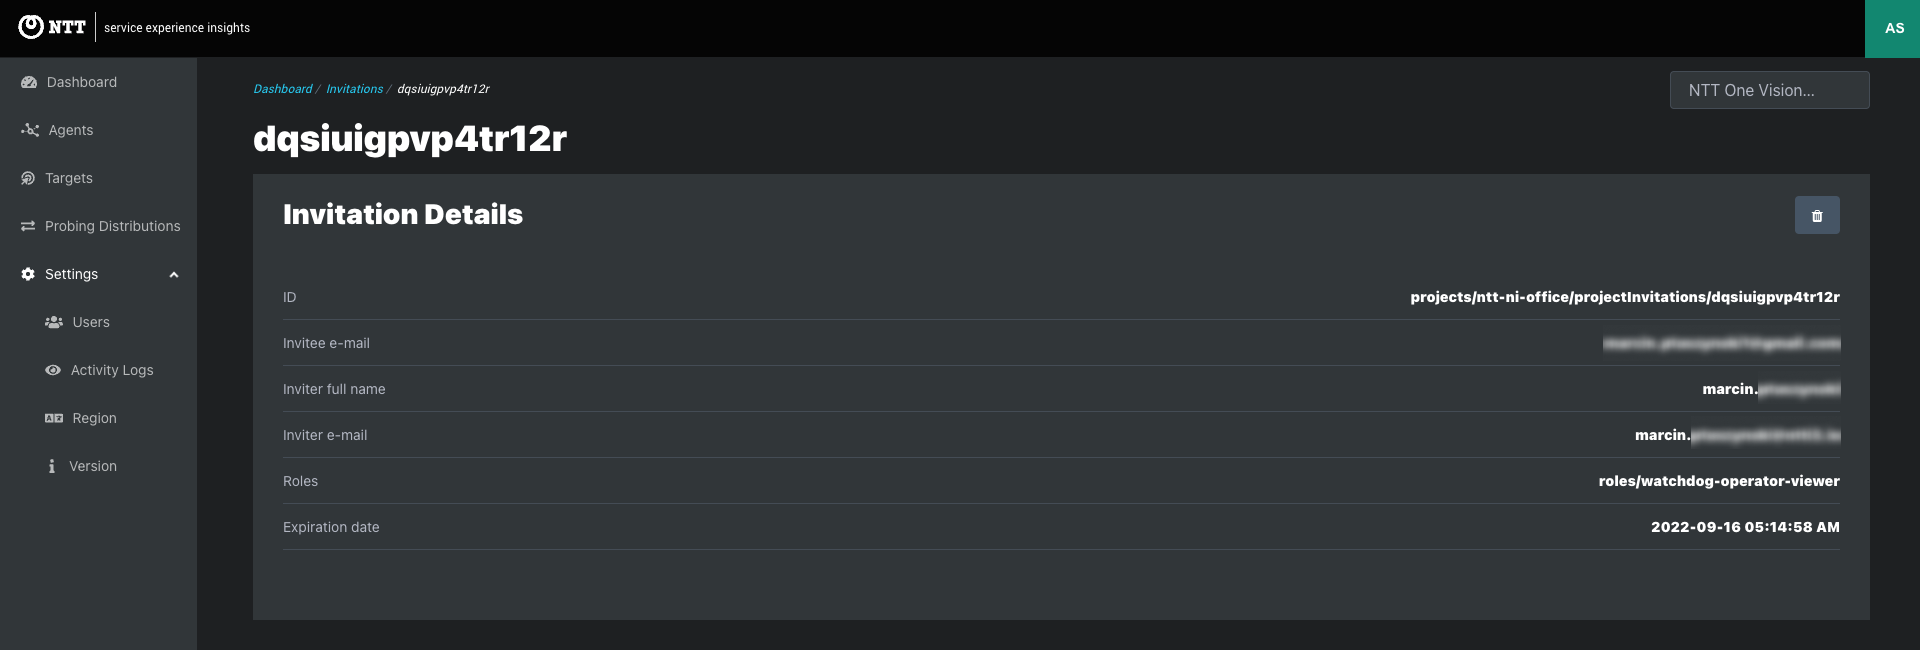
Invitation record

  • Click the invited user’s email address on the Invitations tab to view information about an invitation
    • The invitation id is displayed on this page instead of the user name
    • The invitation converts to a user record when the invited user creates login credentials, enables MFA, verifies email address, and accepts the project invitation on the first login
    • Click the icon to delete user invitations
      • Users with a deleted invitation are still able to create user credentials, but they do not have project access


In This Article